As a Mendix developer, you are likely working with Studio Pro every day. However, there are many simple tricks that you can use in your day to day work that make your life a little bit easier. In this blog post, I will go over some of the pro tips that I have gathered during my time as a Mendix developer.
1. Use dissolve container to quickly remove a container
Got a container you don’t need anymore, but you need to save the content within it? Stop dragging all items out of the container before deleting it! Simply right click the container and select dissolve container to remove the container but keep the content contained within it.

2. Use inline snippet to return snippet contents back to a page
Similar to dissolve container, you can right click a snippet and select inline snippet to put all snippet contents back on a page instantly.

3. Quickly set the return value in a microflow
I used to select the entity to return from a microflow by:
- Double clicking the End event
- Selecting the return Entity type
- Entering a variable to return
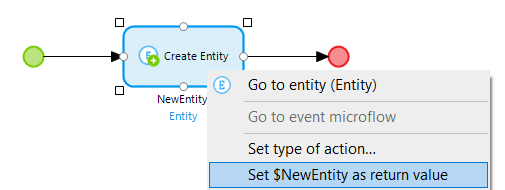
However, you can also right click an activity that contains a variable and press Set as return value to do all of those things at once!
4. Instantly swap input widget types for enumerations and booleans
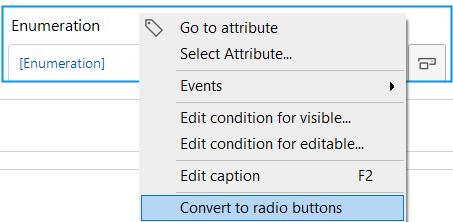
As you probably know, you can use different types of input widgets for enumerations and booleans. Enumeration attributes support drop down and radio button widgets, and booleans support radio buttons and checkboxes. Did you know you can right click those input widgets to instantly swap between the two types of input widgets?
5. Dragging and dropping
Drag and drop is a pattern which is used often throughout Studio Pro. Did you know you can use it in many more instances than you might be aware of?
Drag flows from the Explorer into Microflows
You can either drag a microflow into a blank area of a microflow to create a new Call Microflow activity, or onto an existing Call Microflow activity to replace the subflow call with another.

Drag items from the Explorer into pages
You can drag most items from the Project Explorer into a page to add a widget to your page instantly. You can drag them onto existing widgets or onto blank targets to create a new widget.
Some examples of drag and drop actions that you can do:
- Drag a microflow onto a button to set that microflow as the button action
- Drag a page into a page view to insert a button linking to that page
- Drag a microflow onto a dataview to set that microflow as the datasource

Microflows must return a list before you can drag them onto a listview, and they must return a single object before you can drag them onto a data view.
Drag connector items into data views to insert input widgets
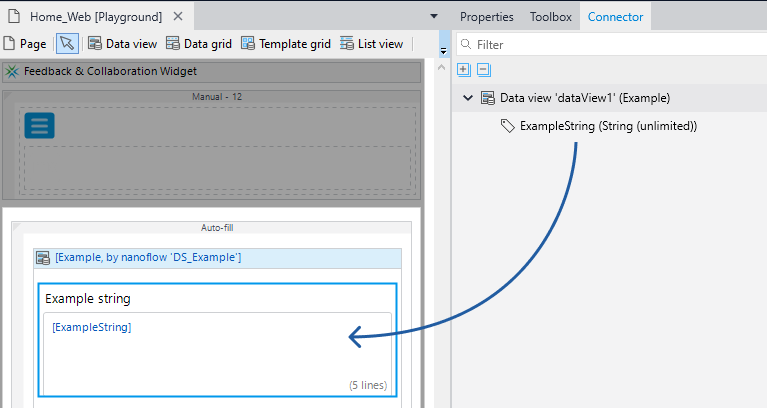
If you have your selection inside a dataview, the connector tab will show you the attributes for the entity in that dataview. You can use the connector to drag any of those attributes into the dataview to instantly create an input widget for that attribute. No more scrolling through the Toolbox to find the correct widget, it automatically select the right type of input widget for that attribute!
6. Keyboard shortcuts
I’m sure you are using some of the shortcut keys that Mendix Studio Pro offers, but are you making full use of them? These are the shortcuts I use every single day:
- Ctrl + Enter to close any window that you currently have open
- Ctrl + G to open the quick find menu
- Ctrl + Space to open the autofill option when entering a variable or XPath
- F5 to run your app
- F9 to view your app
- Ctrl + W to close any open tab
- Shift + mouse wheel scrolls through a microflow horizontally
Refer to the Mendix documentation to view all shortcut keys configured for Studio Pro
7. Use the custom caption option to improve legibility of your microflows
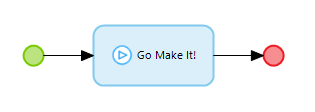
When you call a submicroflow from another microflow, Mendix auto generates the caption that is displayed from the name of the submicroflow. However, you can greatly improve legibility by adding a custom caption to your submicroflow call. Just select the action and press Shift + F2 to enter a custom caption. This way, you can explain in your own language what the microflow is doing.
8. Add custom design properties to your project
In the appearance tab, you can assign design properties to apply to your page content. Selecting a design property adds the corresponding class to that element.
Design properties are defined in design-projecties.json in your project directory. You can add custom design properties to your project to allow all team members to easily discover available custom classes.
For instance, you can add the ‘hide empty’ design property to all listviews by adding the code below to design-properties.json.
From then on, you can select it as a design property in the appearance tab.
"ListView": [
    {
        "name": "Hide empty",
        "type": "Toggle",
        "description": "Hides the 'no items found' in empty lists.",
        "class": "listview-hide-empty"
    }
],
Design properties do nothing besides adding a class to the element, so make sure you have appropriate styling available in your stylesheets to apply to the element!
9. Align your microflows automatically
In a recent release, Mendix added the option to align your microflow actions automatically. Just select the elements that you want to align, and right click to select the correct option. For instance, distribute horizontally automatically adds the same space between all selected actions.
From this:
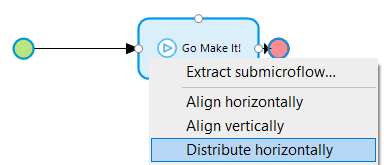
To this!
 More useful when you have more than a single action, obviously.
10. Use the documentation export to quickly generate app documentation
As you are probably aware, Mendix allows you to document content of your app in most places. You can add documentation to domain models, entities, microflows, and even separate microflow parameters. But did you know there is a built-in export feature for these types of documentation files? Just right click your app in the Explorer and select ‘Export documentation’. This automatically generates a comprehensive .html file with all your project documentation!

I hope these tips will help you become a true Mendix Pro. If you have any thoughts, feel free to share them. And remember, stay curious!
